Running a service in Vifug Lyrics
Everything from your first launch to a full Sunday morning: the library, the Preview → Live workflow that makes mistakes hard to make, the offline Bible, and every screen Vifug can light up at once. Grab a coffee - by the end of this page you'll know the app better than most media teams learn it in a month.
Quick start - your first five minutes
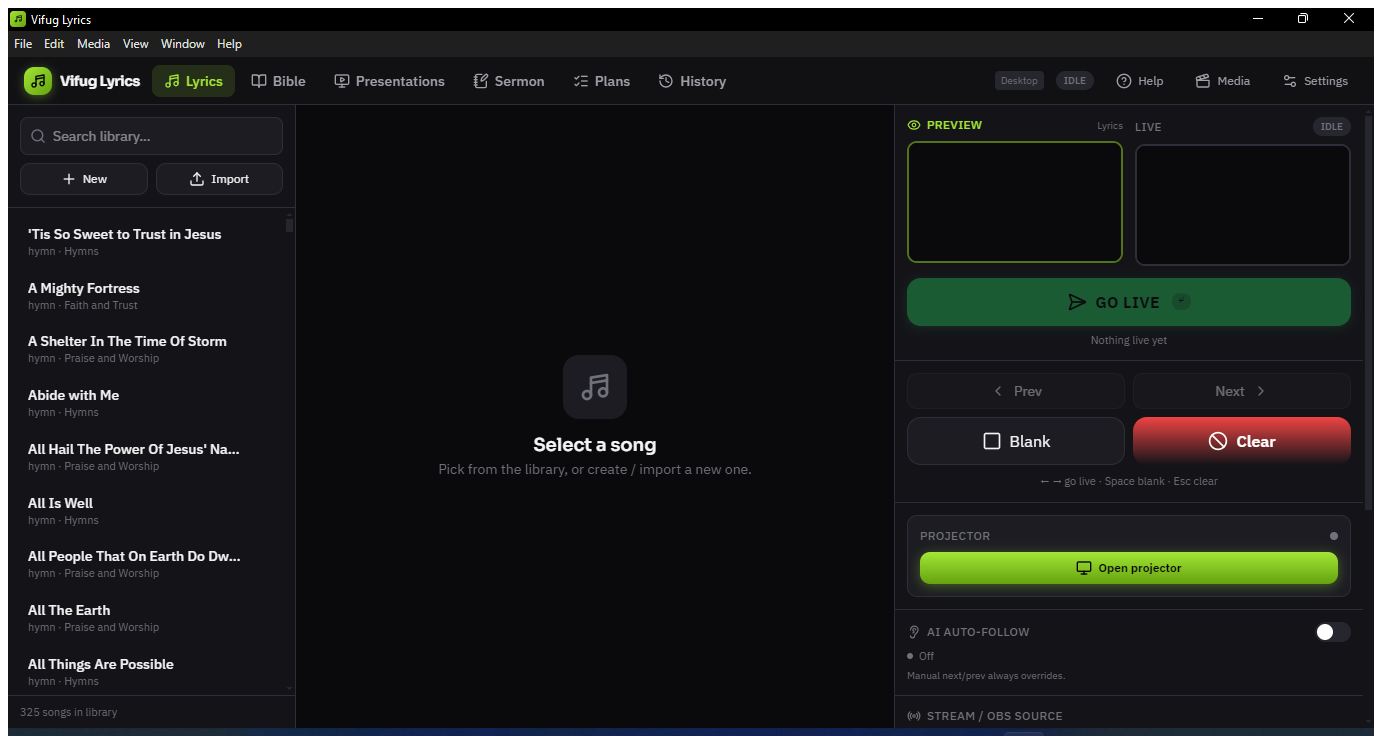
Install it, open it, and you're already looking at a working library. Nothing to configure before your first slide.
-
Install and launch
Run the Windows installer and open Vifug Lyrics. It ships with 1,100+ songs and hymns and the full offline Bible already loaded - no downloads, no account, no internet required.
-
Pick a song from the library
Use the search box on the left to find a song, or click New to write one from scratch. Click a song to open it in the center panel.
-
Preview a slide, then send it live
Click a slide to load it into Preview on the right, check it looks right, then press Enter or hit GO LIVE. That's the whole rhythm of running a service.
-
Open the projector
In the bottom-right Projector panel, click Open projector. On the desktop app it fills your second monitor automatically; in the browser it opens a preview window.
Nothing goes to the projector until you say so. Preview is completely private - the congregation only ever sees what you deliberately send live. That's the whole design philosophy of the app.
The library - your songs, organized
Every song lives as structured text (verses, choruses, bridges), not a fixed slide deck - so changing your theme, font or lines-per-slide never means rebuilding anything.
Search
The search box filters by title, author or tag as you type - fast enough to find a song mid-transition.
Import
Paste plain text and Vifug auto-detects verses and choruses, or import .pro6, .pro, .txt and .docx files straight from ProPresenter or a document.
Edit
Reorder sections, repeat a chorus, or add a new verse straight from the editor - changes apply live without re-importing anything.
Translate
Add a second-language line per section from the song's Translate panel, then enable dual-language display in Settings to show both at once, in whatever color you choose.
Preview → Live: the core idea
This one habit is what separates a calm, professional media booth from a stressed one. Two stages, one output.
Click any slide, or press the arrow keys, to load it here. Fix a typo, double-check a Bible reference - the congregation sees none of it.
Press Enter or click GO LIVE and Preview becomes Live everywhere at once: projector, stage display, OBS overlay and NDI receivers, perfectly in sync.
Two more transport controls are worth knowing:
- Space - Blank the output to black without losing your place, for prayer or a transition.
- Esc - Clear the live slide entirely.
The Bible tab
Switch from the Lyrics tab to Bible at the top of the operator window. Everything below is fully offline.
-
Pick a version
KJV, WEB, ASV and BBE are always available. Turn on Yoruba, Hausa or Igbo from Settings → Bible and they'll show up in the version picker too.
-
Jump straight to a reference
Type something like John 3:16 or even john 3 16 in the search box - Vifug parses loose formats and jumps straight to the verse, scrolled into view.
-
Search by keyword
Type any phrase instead of a reference and Vifug searches the full text of the current version and lists every match.
-
Preview, then send
Same rhythm as songs: click a verse to preview it, Enter to send it live. Pressing Enter again on a reference you've already previewed sends it straight live.
Look & feel - make it yours
Open Settings from the top bar for a side-nav of everything visual, split into Lyrics, Bible and General so scripture and songs can look completely different if you want.
Theme, font & color
Pick a base theme, then override font family, size, weight, alignment and color independently for lyrics, Bible text, and even the translation line.
Backgrounds
Use an image, a looping video, or a solid color behind your lyrics. Upload your own or paste a URL - it flows through to the projector, stream overlay and stage display automatically.
Fullscreen or lower third
Show text fullscreen, or as a lower third pinned to the top, middle or bottom - with an optional solid backdrop bar behind the text band.
Lines per slide
Vifug re-paginates on the fly, so changing this from 2 to 4 lines reshuffles every slide in the song instantly - nothing to rebuild.
Service plans - line up the whole morning
The Plans tab lets you build a run-of-show ahead of time: songs, scripture references, section headers and blanks, in the order you'll actually use them.
-
Create a plan
Name it (e.g. "Sunday 9am") and optionally set a service date.
-
Add items
Add songs, scripture references, header labels for sections like "Announcements", or blank spacers - drag to reorder.
-
Cue on the day
Click Cue on any item during the service and Vifug switches to the right tab and loads it, ready for Preview → Live.
Every screen, always in sync
One live state, rendered everywhere it needs to be.
Projector
Right-click the Preview or Live screen for a quick menu, or use the Projector panel - Vifug detects newly connected monitors live and lets you pick which one to use, no restart needed.
Stage display & remote
Open the stage URL on a screen facing the worship team for current + next slide and your service notes, and the remote URL on a phone to advance slides while you walk the stage.
The remote asks for a PIN the first time each phone connects - find it in Settings → Streaming & output → Outputs & companion screens. Everyone on your Wi-Fi can reach the remote page, so the PIN is what stops a stranger blanking the screen mid-service. Each phone remembers it, so you only type it once.
OBS & native NDI
Copy the stream URL into OBS or vMix as a transparent Browser source, or publish a real NDI source straight from the desktop app - no capture card needed.
AI auto-follow
Turn this on in Settings → AI auto-follow and Vifug listens to the room and advances slides as the words are sung - your manual next/prev always wins. Needs a free Deepgram API key.
Teleport to OBS / vMix
One click drops Vifug's live overlay straight into OBS or vMix as a source - no copying a URL into a browser-source dialog by hand. Find it in Settings → Streaming & output → Teleport to OBS / vMix.
Teleport to OBS
-
Turn on OBS's WebSocket server (once)
In OBS: Tools → WebSocket Server Settings → Enable WebSocket server. Note the port (4455 by default) and, if you set one, the password.
-
Fill in the connection details in Vifug
Host is normally
127.0.0.1if OBS runs on the same machine - change it only if OBS is on another PC on your network. Paste the password if OBS asked you to set one. -
Click "Teleport to OBS"
Vifug adds a Browser Source named "Vifug Lyrics" to whatever scene is currently on program in OBS. Click it again any time - it updates the existing source instead of adding duplicates, and re-adds it to your current scene if you've since switched scenes.
Requires OBS 28 or newer - the WebSocket server has shipped inside OBS itself since then, no plugin to install.
Teleport to vMix
-
Make sure vMix's Web Controller is on
It's enabled by default on port 8088 - nothing to turn on for most setups.
-
Fill in host and port, then click "Teleport to vMix"
Vifug adds a Web Browser input pointing at the live overlay. vMix's API can't confirm success back to a browser, so a message here means "sent" - check vMix's input list to see it land, and resize/rename it there if you like.
Once it's in, it stays live. Teleporting only automates the one-time setup - after that, both the OBS source and the vMix input update themselves automatically as you go live, blank, or clear in Vifug, exactly like the manual browser-source bridge in the NDI panel.
Keyboard shortcuts
Learn these four and you'll rarely touch the mouse during a service.
| → ↓ Page Down | Preview the next slide |
| ← ↑ Page Up | Preview the previous slide |
| Enter | Send the previewed slide live |
| Space | Blank the live output to black |
| Esc | Clear the live slide |
| F9 | Open or close the projector |
| Esc (on the projector) | Close the projector window |
Shortcuts are disabled automatically while a text field, dropdown or modal is focused, so you can safely type song titles without triggering Blank or Clear.
Change them to whatever you already know
Coming from ProPresenter or EasyWorship, or using a presenter clicker that sends something unexpected? Open Settings → Shortcuts, click Change next to an action and press the key you want. Modifier combos work too - Ctrl+Shift+B is a valid binding.
If the key already belongs to another action, Vifug refuses the change and tells you which one owns it, rather than quietly leaving two actions fighting over one key. Reset to defaults puts everything back.
Streaming the service
Vifug produces the lyrics layer; OBS Studio mixes it with your camera and sends it to YouTube or Facebook. OBS is free, and it is what handles the encoder, bitrate and connection - Vifug's job is to hand it a clean, transparent overlay.
Set the canvas first
In Settings → Streaming & output → Stream canvas, pick the size your OBS canvas uses - 1920×1080 for a normal stream, or 1080×1920 for a vertical one. Vifug lays the overlay out at exactly that size and scales it to fit, so a lower third lands in the same place no matter what size the browser source ends up. Get this wrong and your text drifts or changes size when the source is resized.
-
Add Vifug as a Browser source in OBS
In OBS: Sources → + → Browser. Paste the stream URL from Settings → Streaming & output → Outputs & companion screens, and set Width and Height to match the canvas you chose above. Leave the background transparent - do not tick "Shutdown source when not visible", or the overlay reconnects every scene change.
Quicker route: Settings → Streaming & output → Teleport to OBS adds the source for you.
-
Stack it above your camera
In the Sources list, the Vifug browser source must sit above your camera or capture card. OBS draws top-down, so anything above covers what is below. If your lyrics have vanished, this is almost always why.
-
Choose your encoder
In OBS → Settings → Output → Streaming. If your PC has a modern graphics card, pick the hardware encoder - NVENC on NVIDIA, AMF on AMD, QuickSync on Intel. It offloads the work from the processor, which matters because Vifug is running on the same machine. Only fall back to x264 (software) if no hardware encoder is offered.
For 1080p30, a bitrate of 4000–6000 Kbps is the normal range. Higher is not better if your upload can't sustain it - a stream that buffers looks far worse than one at 3500 Kbps that never stutters. Test your actual upload speed and use about half of it.
-
Connect YouTube or Facebook
YouTube: open YouTube Studio → Go Live. Copy the Stream key. In OBS: Settings → Stream → Service: YouTube, paste the key.
Facebook: open facebook.com/live/producer, choose Streaming software. Copy the stream key. In OBS: Settings → Stream → Service: Facebook Live, paste it.
Treat a stream key like a password - anyone holding it can broadcast to your channel. Don't show it on screen while screen-sharing, and reset it if it leaks.
-
Do a private test before Sunday
Both platforms let you stream unlisted or to "Only me". Run five minutes, then watch it back: check the lyrics are readable at phone size, the audio is in sync, and the frame rate is steady. Font sizes that look fine on a monitor are often too small on a phone.
A note on TikTok and Instagram. TikTok only issues stream keys to accounts approved for live streaming, so OBS may not be an option on your account. Instagram has no official desktop streaming - tools claiming otherwise are unofficial and can put the account at risk. Streaming to Facebook and having people watch there is the dependable route.
Live video, cameras and capture cards
Vifug can take a live picture into the output and share the screen between that video and your words. Open it from Media → Screen / Window Capture, or the Capture screen / window button in the Media Library.
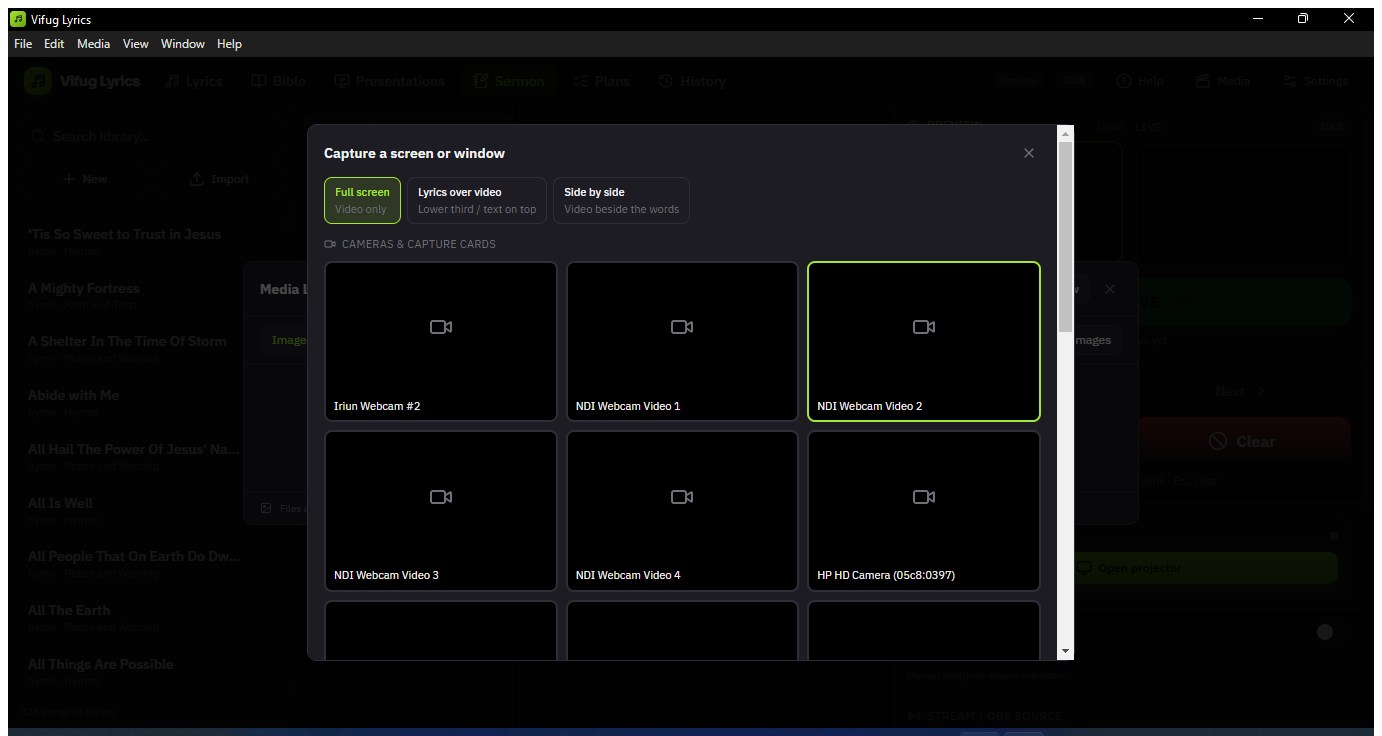
What you can bring in
The picker groups sources three ways:
- Cameras & capture cards - a webcam, or an HDMI capture card carrying a camera, a laptop or a sound desk feed. A capture card shows up here, not under Screens, because Windows presents it as a video input like any camera.
- Screens - a whole monitor, for playing something from another app.
- Windows - a single application window, so nothing else on that screen leaks to the congregation.
If your capture card is missing from the list, it is almost always in use by something else. Close OBS, Zoom, Teams or the manufacturer's own preview app and reopen the picker, which refreshes every few seconds.
Three ways to share the screen
Pick the layout before choosing the source. The buttons sit at the top of the picker.
-
Full screen
The video fills the output on its own. Use it for a video message, a testimony recorded in advance, or a camera feed shown while nothing needs to be read.
-
Lyrics over video
The video fills the screen and your lyrics or scripture sit on top of it. This is the lower third case: set Settings → Look & feel → Display mode to Lower third and the words sit in a band across the bottom, leaving faces clear. Leave it on Fullscreen and the words are centred over the picture instead.
The text colour and outline you already use still apply. Over a bright or busy picture, turn on the text outline or shadow so words stay readable when the shot changes.
-
Side by side
Video and words each get their own half, so neither covers the other. This is the one to use when the camera feed is portrait - a phone or a vertical stage camera - and the scripture is landscape. The video keeps its own shape rather than being stretched, so a portrait feed sits upright in its half with black either side.
Stopping
Open the Media Library and press Stop capture. The output returns to exactly the slide that was showing before, so ending a video does not lose your place in the song.
Test with the real camera before the service. Capture cards vary a great deal, and the only way to know a card gives a clean picture at the size you need is to run it on the machine you will use on Sunday.
Sermon notes and the media library
The message and the pictures that go with it, kept in the same place as the songs.
Sermon notes
Open the Sermon tab, press New sermon, then Edit and paste in the message the pastor gave you. Add a speaker and a date or series name so it is easy to find again later.
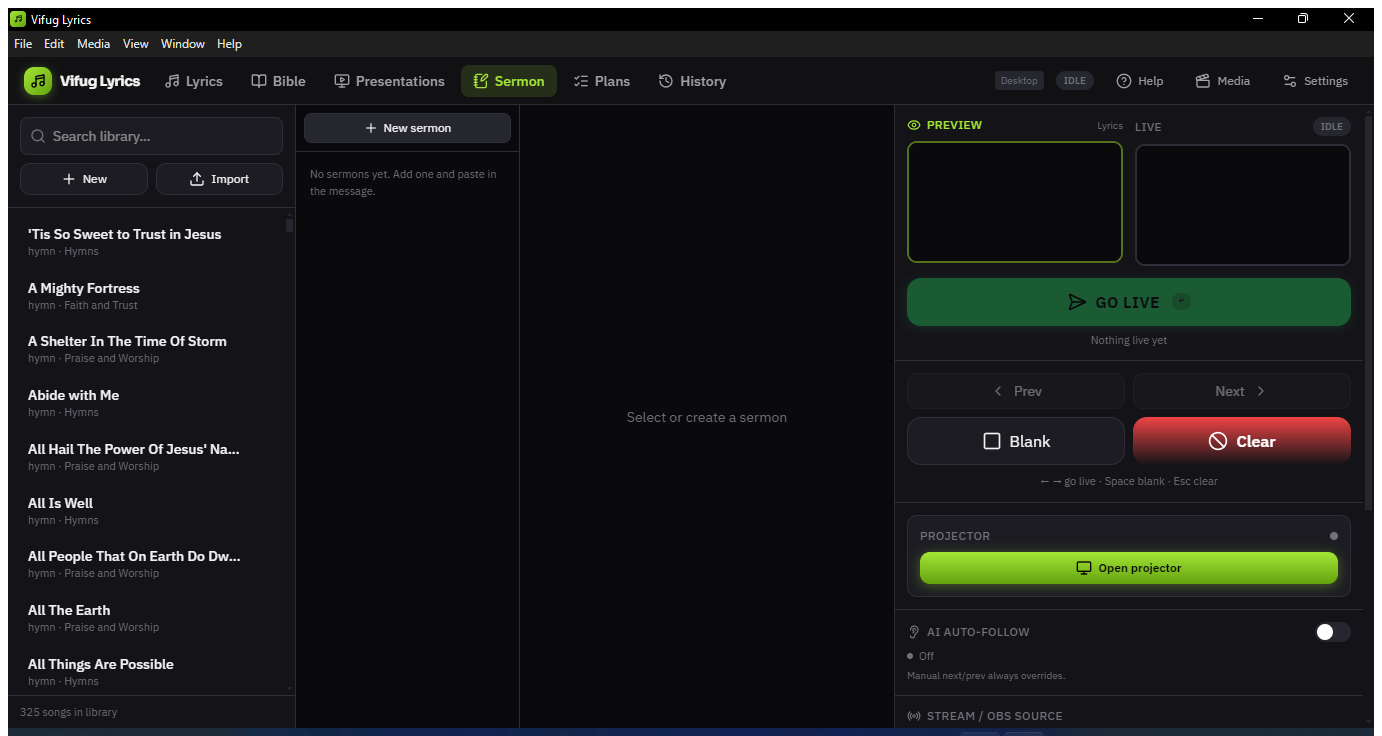
Once the text is in, highlight it. Pick a colour, select some words, and press Highlight selection. The four colours are there to mean something rather than just look different:
- Key point for the lines you intend to put on the screen.
- Scripture for references you will need to pull up in the Bible tab.
- Illustration for the stories, so you can see them coming.
- Application for the closing challenge.
Double-click any highlight to put it on the screen. It goes out through the same path as a presentation slide, so it picks up your presentation look and reaches the projector, the stream overlay and the stage display together.
Editing the text clears its highlights, and Vifug warns you before saving. Colours are pinned to positions in the text, and those positions all move as soon as you add or remove a word. Paste the message first, then mark it up.
The media library
Open it from the Media button, or Media → Media Library. Images, videos and audio each get their own tab, and you can drop several files in at once.
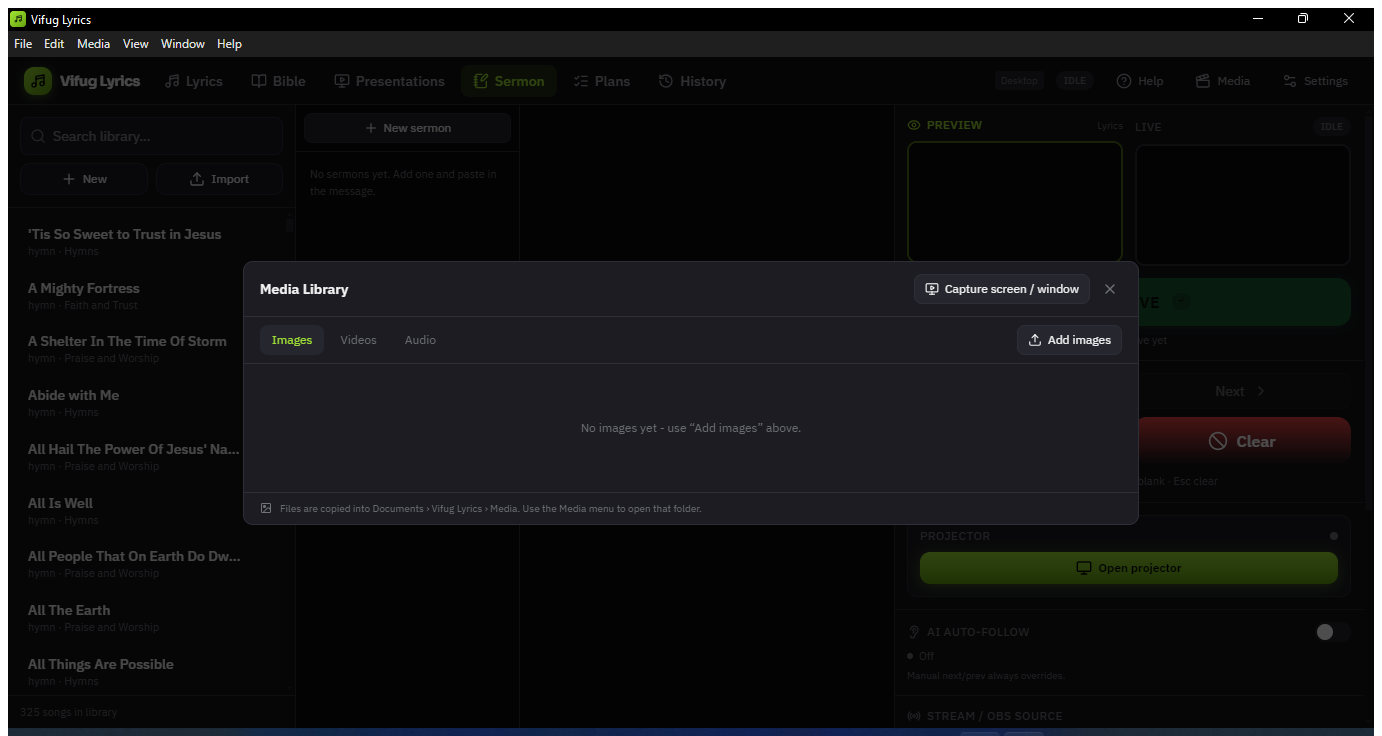
Files are copied into Documents › Vifug Lyrics › Media, a normal folder you can open yourself. Media → Open Media Folder takes you straight there. That means you can back the folder up, copy it to another machine, or drop files in from Explorer without going through the app at all.
Images and videos also show up as background choices wherever you pick a background. Audio does not, because a sound file cannot be a backdrop.
A few things people ask early on
Do I need internet for any of this?
Can lyrics and Bible verses look different from each other?
What if I plug in a projector mid-service?
Where do I go for setup help on streaming or AI auto-follow?
Do I need a plugin to get lyrics into OBS or vMix?
Ready to run your first service?
The library and Bible are already loaded - open the app and try it.